This guide walks you through adding and customizing a Google Map element on your page.
Step 1: Add the Google Map Element
Open the Elements menu from the left-hand panel.
Scroll down and find the Google Map element.
Drag and drop the Google Map element into your desired column or section until you see the yellow placement bar.
Step 2: Access the Map Settings
Hover over the Google Map area on your page.
Click the Edit option from the green menu to open the inspector on the right-hand side.
Step 3: Customize the Map Settings
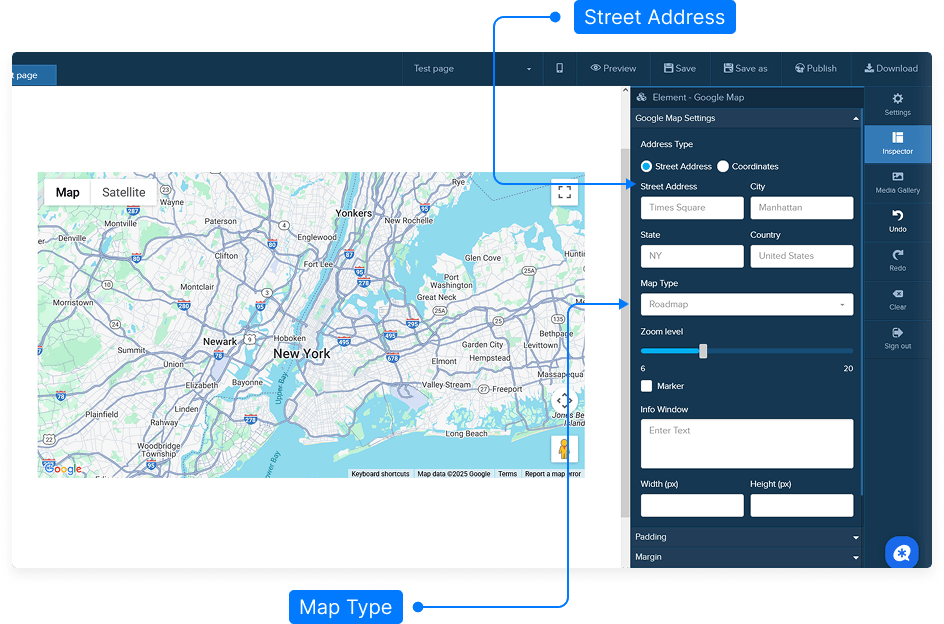
Address Type: Choose between using a street address or coordinates (latitude and longitude) for your map’s location.
Map Type: Select the display type — roadmap, satellite, or hybrid.
Zoom Level: Adjust how close or far the map view is by moving the zoom slider left or right.
Marker: Enable a marker to pinpoint the exact location on the map.
Info Window: Add custom text to the map’s info window to display details about the location.
Width and Height: Set dimensions for the map if needed. It’s recommended to leave these fields empty for mobile responsiveness.
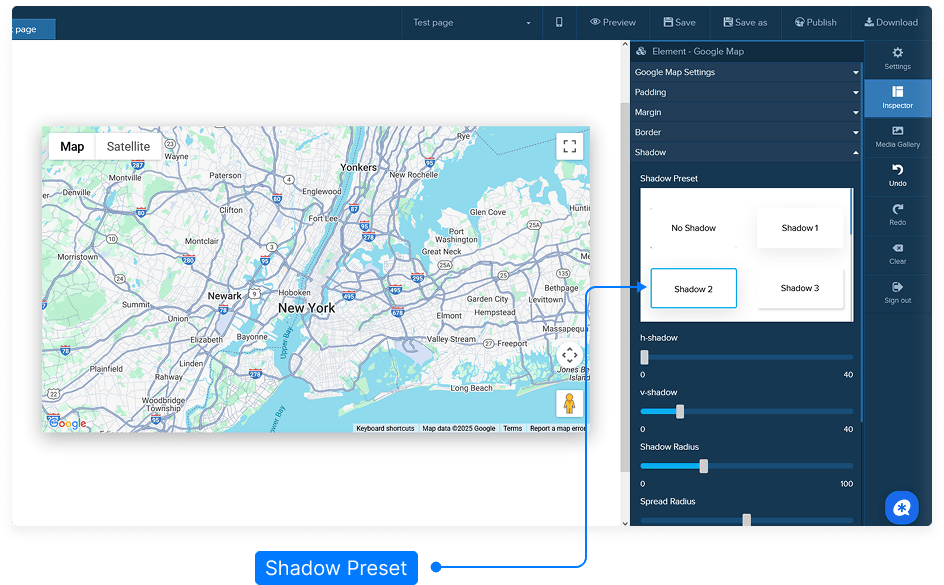
Step 4: Adjust Layout and Style
Padding: Adjust the internal spacing around the map within its block.
Margin: Set the external spacing between the map and other elements on the page.
Border: Add a border around the map and customize its color and thickness.
Shadow Effects:
Add horizontal or vertical shadows.
Control the shadow radius (disbursement).
Choose a shadow color for visual depth.
Step 5: Advanced and Visibility Options
Custom CSS: Add your own CSS code for advanced styling or layout customization.
Visibility: Choose where the map will appear — on desktop, mobile, or both.
Step 6: Save Your Page
Once you’ve completed all your customizations, click Save to apply your changes.
That’s it! You’ve successfully customized your Google Map element.