When you log into your account, the main dashboard is your starting point for managing projects, creating new content, and accessing various tools. Here's a step-by-step walkthrough of all the options available on your dashboard.
Main Dashboard Overview
Once you log in, you’ll be on the main dashboard. Clicking the dashboard button on the top left will always bring you back to this main view where you can find all of your projects.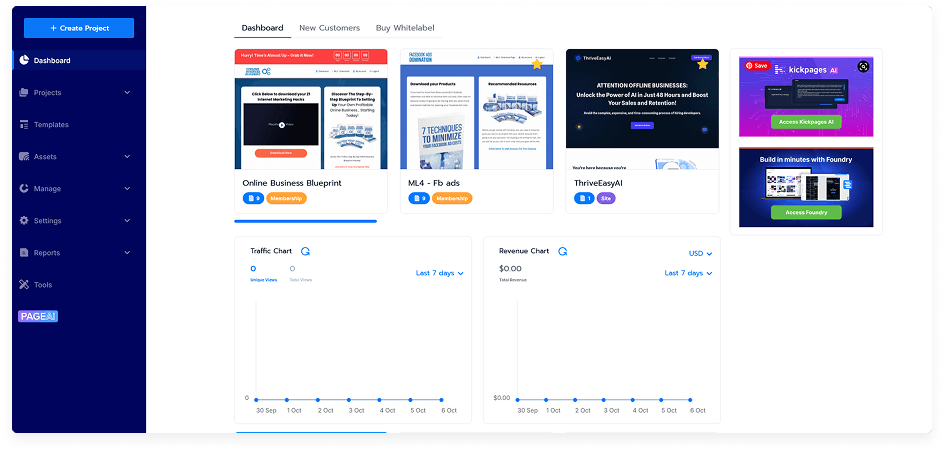
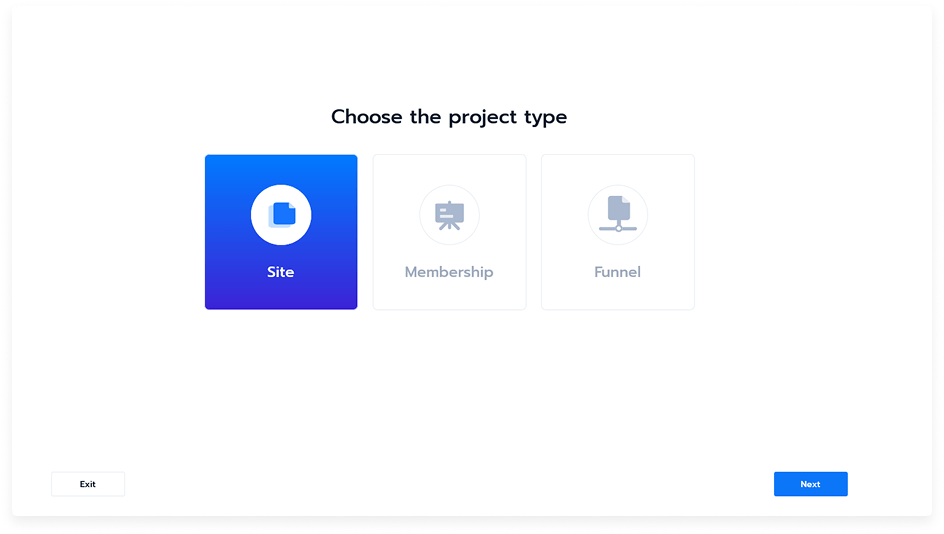
Click Create Project
Choose Project Type:Create Site
Create Membership
Create Funnel
Manage Menu
Hover over the Manage option to access tools for organizing and maintaining your assets:Co-Projects
Archive
Integrations
Leads
Categories
Coupons
Help and Support
Click the Help icon to open the support and knowledge base in a new tab for guidance or troubleshooting assistance.Account Settings
Click My Account to:Update account and billing details
Upgrade your account
Change your password
Adjust app settings
Viewing and Organizing Projects
You can:Toggle between thumbnail view and list view
Filter projects alphabetically, by creation date, or by last modified date
Choose how many projects display per page
Search for projects using keywords
Create a new project using the New Project button
Favorites
Add any project as a favorite so it appears at the top of your dashboard for quick access.Project Settings and Actions
Hover over the settings (gear) icon on a project to open options:Edit – Opens the project in the editor
Clone – Creates a copy of the project
Share – Share via email (single or multiple addresses) and set privacy preferences
Save as Template – Enter a template name and choose or create a category
Archive – Moves the project out of the main dashboard view
Delete – Permanently removes the project
Saving a Project as a Template
When saving as a template:Enter a template name
Select a category or create a new one
Click Save
The project will now be available for reuse in future projects.
Archiving and Deleting
Use the Archive option to hide a project from the main dashboard without deleting it. Use Delete to permanently remove it.
That’s it! You now know how to navigate your main dashboard, manage your projects, and streamline your workflow effectively.